
Match duration to the action
Give the movement enough time to read without adding empty seconds. A short orbit and a multi-stage action need different pacing, so preview the full clip before extending it.
Create a Kling 3.0 shot from text or a starting image. Describe the action and camera movement, then choose the duration and audio for your clip.
Kling 3.0 is useful when a video brief depends on deliberate motion and a clearly staged shot. The example here is a standalone output; the source-and-result comparison appears in the next section.
State what moves, how the camera moves, and how the shot should end. One coherent action is easier to judge than several events competing inside a short clip.
Use text when the scene itself is open to invention. Use image to video when a particular subject, composition, or design should establish the first frame and visual direction.
Watch the beginning, transition, and final frame. Look for silhouette drift, unstable surfaces, abrupt camera speed, and details that only fail once the subject turns.
A single continuous shot is easier to control and reuse. If the idea needs several beats or viewpoints, consider making separate clips and assembling them in an editor instead of forcing every change into one generation.
“Keep the subject centered while the camera makes one slow orbit. Preserve the object shape, use steady studio light, and end on a clean three-quarter view without a scene cut.”
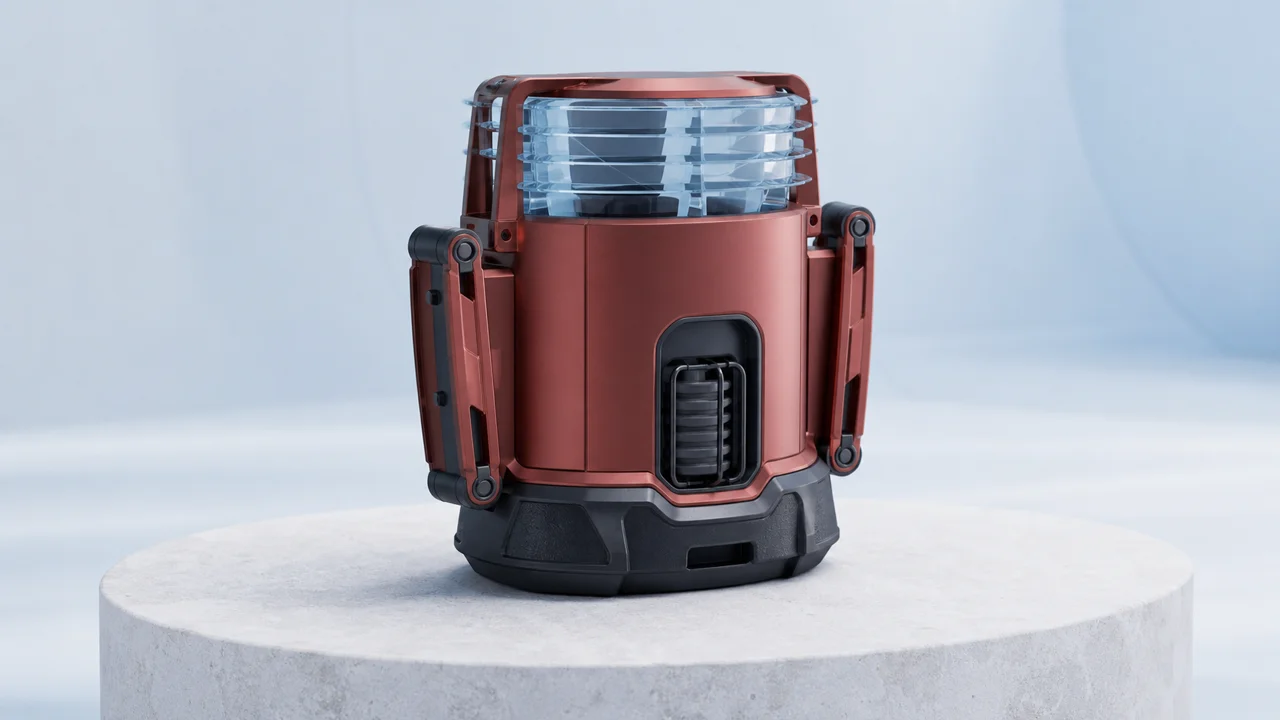
This paired example shows the exact starting image beside its Kling 3.0 output. It makes the tradeoff visible: the source sets appearance, while the prompt must still direct motion, camera behavior, and restraint.
Say that the camera orbits, tracks, pushes in, or stays fixed. Name the subject action separately. Concrete verbs make it easier to tell whether the result followed the intended shot.
Call out the silhouette, product markings, background, or horizon when continuity matters. Keep the stability list short enough that the main action remains clear.
Ask for a settled final frame, a completed turn, or a clean exit when the edit needs one. A defined ending helps you evaluate whether the clip can connect to the next shot.
When the result is close, revise either the subject action, camera path, speed, or ending. Keeping the other choices stable makes the next clip a useful comparison instead of an unrelated variation.
“The camera makes a smooth clockwise orbit around the field recorder. The object stays fixed on the platform, its shape remains consistent, and the pale background moves with gentle parallax.”
Controls should serve the shot instead of becoming the idea. Choose duration, shape, resolution, and audio after the motion plan is clear. Change one setting at a time when comparing results, and keep a note of the combination that produced the most usable movement, framing, and finish for the destination.
Give the movement enough time to read without adding empty seconds. A short orbit and a multi-stage action need different pacing, so preview the full clip before extending it.
Select portrait, square, or landscape around the final placement. Keep important subjects away from crop-sensitive edges when the video may be adapted for several channels.
Use the audio option only when the selected workflow exposes it and sound helps the scene. Listen to the entire result; a useful picture does not guarantee useful audio.
The workspace shows the current credit amount before submission. Recheck it after changing model, duration, resolution, or audio, because those choices can change what the generation requires.
Write down the first visible failure and the part that already works. A specific note about drift, pace, or framing leads to a more controlled revision than adding extra cinematic adjectives.
Open Kling 3.0 and choose text to video or image to video. For an image based shot, add a clear starting frame with enough room around the subject. For a text based scene, decide the subject and setting before adding camera language. You can select another video model without leaving the shared generator if your needs change.
Write the main action, its pace, and the camera intention. Select a duration that fits that action, review the framing and audio choice, and check the credit amount. Keep any preservation instructions specific. The generator handles the submission; this page helps you prepare a shot that you can evaluate when the result is ready.
Play from the opening frame through the final moment. Check continuity of shape, direction, background, and camera speed, then listen if audio was requested. Download a useful version before moving on. If another attempt is needed, change the instruction responsible for the main issue instead of rewriting every part of a brief that was otherwise working.
Plans for image and video
Annual plans are billed upfront. The same plan credits refresh every 30 days and expire at the end of that window; unused subscription credits do not roll over.
Explore the workspace and prepare a first request before choosing a paid plan.
For occasional image and video experiments with a predictable monthly ceiling.
Subscriptions renew automatically at the selected monthly or yearly rate until canceled. Cancel future renewals in your account.
For creators who iterate every week and need room for several directions.
Subscriptions renew automatically at the selected monthly or yearly rate until canceled. Cancel future renewals in your account.
For sustained, high-volume creation and access to the highest available output quality.
Subscriptions renew automatically at the selected monthly or yearly rate until canceled. Cancel future renewals in your account.
Prices are in USD. Subscriptions renew automatically; credit packs are one-time purchases.
Compare plansThe page opens Kling 3.0 with the Standard option used by this workspace. It describes the controls available here rather than every capability associated with the wider Kling family. Check the selected model in the generator if you have switched to another video model during your session.
Yes. Choose image to video and provide one starting image. The image establishes the initial composition, while your prompt describes the intended movement. Use a clear source with the subject visible; a low quality or obstructed image leaves more of the scene for the model to infer.
Yes. Text to video does not require an image. Describe what appears in the scene, what happens, and how the camera observes it. Choose the available aspect ratio for the final placement. If a specific existing design must be recognizable, the image workflow gives you a more concrete starting point.
This workspace provides a single clip prompt rather than a multi shot storyboard editor. Keep the requested action coherent within the chosen duration. If separate scenes need their own timing and framing, create a plan for individual clips and assemble the sequence in your editing workflow.
A new viewpoint can reveal surfaces that were not visible in the starting image. The model has to infer those details, and geometry can change. Try a smaller camera movement or a clearer reference, then check the entire clip for unwanted changes rather than judging only the first frame.
Start with your required input, duration, framing, and audio controls. Compare results using a similar brief and the same review criteria when you have suitable examples. This page does not claim a universal winner. The model directory and image to video guide help you choose a starting point for your particular shot.
Choose a clear action, a deliberate camera move, and a duration that fits.