
Product reveal
Start from a clean product view and use a restrained orbit, turntable motion, or light change. Watch labels, edges, and proportions throughout the clip.
Start with a still image and describe how it should move. Choose a video model, review the settings, and create a clip around one clear action.
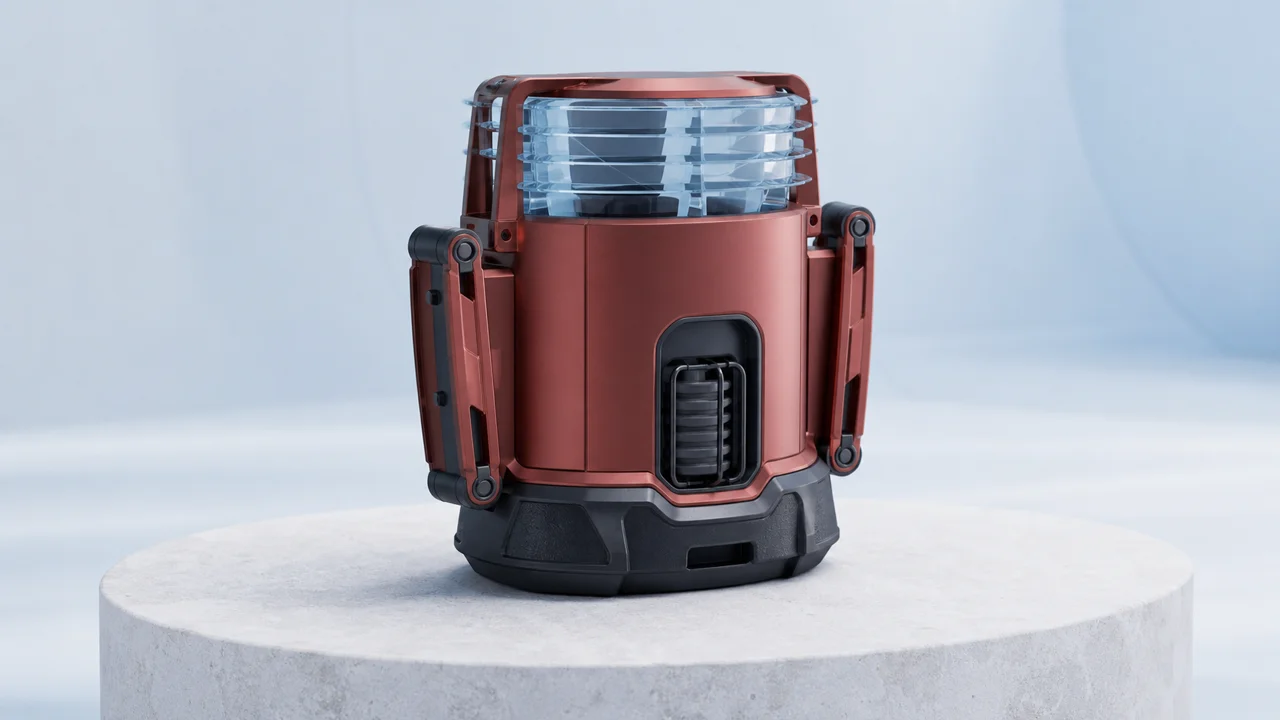
A strong image-to-video result starts with a frame that already communicates subject, composition, and depth. This exact pair lets you compare the source image with the motion added to it.
Choose a sharp image with a clear subject and enough room for the planned movement. Awkward crops, tiny details, and overlapping limbs often become harder to control once motion begins.
Give a turning subject space beside it and a push-in shot depth behind it. The source composition should support the motion rather than force the model to invent missing space.
Keep critical text, identity, and product geometry large and visible. Generated movement can change hidden surfaces or fine details, so review the complete clip before approval.
Open the source at full size before uploading it. Compression artifacts, accidental text, weak edges, or an already blurred subject can become more noticeable once the clip introduces movement and changing detail.
“Make one slow clockwise orbit around the field recorder. Keep the device fixed on the platform and preserve its shape. Use gentle background parallax and finish on a steady three-quarter view.”
The image describes appearance; the prompt describes change. Keep the motion instruction focused enough that you can identify whether the source, the action, or the camera caused an unwanted result.
Write the subject action first, then the camera move. A coat fluttering while the camera slowly pushes in is easier to interpret than a vague request for cinematic motion.
Begin with one dominant change: a turn, orbit, reveal, or environmental movement. Add another action only when it supports the same shot and remains easy to evaluate.
Use words such as slow, steady, or quick with a visible action, and describe the final frame when it matters. Avoid stacking several mood adjectives that do not change movement.
Mention light or atmosphere only when it should visibly change during the shot. The source image already carries much of the look, so motion instructions should keep priority over repeated style description.
“Use one deliberate camera move and one subject action. Keep the background stable, preserve the main silhouette, avoid scene cuts, and end on a frame that can hold for editing.”
Image to video works best when the still already carries the visual idea and motion adds a clear purpose. These are practical ways to keep a short clip useful.
Start from a clean product view and use a restrained orbit, turntable motion, or light change. Watch labels, edges, and proportions throughout the clip.
Use a stable pose and ask for one subtle expression, head turn, or fabric movement. Small motion is often easier to approve than a dramatic change in stance.
Let clouds, mist, water, foliage, or light provide movement while the composition stays recognizable. Avoid combining a large camera move with several environmental changes at once.
Plan an ending that can hold, cut, or connect to another shot. Check both the opening and closing frame instead of judging only the most attractive moment.
Choose repeating motion such as steam, fabric, water, or a mechanical cycle, and keep the camera stable. Compare the opening and ending so the clip can be trimmed into a smoother loop.
Use a source with a strong subject at small viewing sizes. Ask for one immediate action, preserve safe space for later captions, and judge whether the idea reads without relying on sound.
Choose a model by the inputs and settings shown in the generator. The best choice is the one that supports your source image, shot length, final placement, and the detail that matters most. Start with the option whose visible controls match the plan, then compare another model only when a specific weakness remains. Keep the source image and main motion instruction the same so the comparison gives you a clear answer.
Confirm that the selected workflow accepts the source you have and exposes the reference controls you need. Do not assume every model uses the same input arrangement.
Compare the available duration, aspect ratio, resolution, and audio choices with the planned shot. Controls that do not affect the task should not drive the decision.
Detailed products, recognizable people, and exact typography need closer continuity checks than atmospheric scenery. Choose a simpler shot when approval accuracy matters more than spectacle.
Read the credit amount shown before submission and recheck it after changing settings. If generation is unavailable, keep the source and prompt ready rather than inventing unsupported settings.
A model is useful when its result gives you a clear next decision. Compare one controlled prompt across suitable options when needed, then continue with the choice that best preserves the parts your project cannot trade away.
Open image to video and choose a clear source image. Check its crop, the space around the subject, and any details that must remain recognizable. You can prepare a new image in the image generator first if you do not yet have a suitable starting frame. Read the upload requirements before selecting a file.
Write the main action, camera intention, pace, and ending. Choose a video model, then review its current duration, resolution, framing, and audio controls. Check the credit amount before submission. If the generator reports that a requirement is missing or generation is unavailable, follow that message; adding extra prompt text will not resolve an account or availability issue.
Play the whole video, including the last second. Check for drifting features, abrupt cuts, changing backgrounds, and unexpected movement. Download a useful version before making another attempt. If the clip misses the brief, decide whether the next change belongs in the source image, motion instruction, or settings, then revise that part deliberately.
Plans for image and video
Annual plans are billed upfront. The same plan credits refresh every 30 days and expire at the end of that window; unused subscription credits do not roll over.
Explore the workspace and prepare a first request before choosing a paid plan.
For occasional image and video experiments with a predictable monthly ceiling.
Subscriptions renew automatically at the selected monthly or yearly rate until canceled. Cancel future renewals in your account.
For creators who iterate every week and need room for several directions.
Subscriptions renew automatically at the selected monthly or yearly rate until canceled. Cancel future renewals in your account.
For sustained, high-volume creation and access to the highest available output quality.
Subscriptions renew automatically at the selected monthly or yearly rate until canceled. Cancel future renewals in your account.
Prices are in USD. Subscriptions renew automatically; credit packs are one-time purchases.
Compare plansThe image shows what the scene looks like, but it does not fully specify what should happen. Use the motion prompt required by this workspace to describe the action and camera intention. A brief, focused instruction is more useful than repeating every object already visible in the source.
Input requirements depend on the selected model and workflow. Follow the reference controls shown by the generator rather than assuming that a gallery of images becomes a sequence. This page describes animating a starting image, not a slide show builder or a timeline with independently timed scenes.
Generated motion can change details, particularly when the subject turns or the camera reveals hidden surfaces. Use a clear source, keep the motion focused, and review the full result. When exact text, identity, or product geometry is essential, plan for a careful approval or editing step.
Some model selections expose an audio option. Check the controls for the model you choose instead of assuming sound is available everywhere. If you request audio, listen to the complete result and judge its relationship to the scene. You can also plan to add a soundtrack separately in a video editor.
Reduce the requested action or camera movement and describe a slower, more limited change. Keep other instructions stable so you can judge the difference. If the source image suggests an awkward pose or an unstable composition, revising the image may be more effective than adding more motion constraints.
Create or prepare one before starting the video. The image workspace can help explore a composition, while text to video is an alternative when you want the video model to establish the scene itself. Choose the path based on whether a particular starting appearance is important to the result.
Choose a readable image and one clear motion goal, then review the clip from beginning to end.